Microsoft Word 2007 - Tables
Choose the number of rows and columns you wish to have. For example if you want 4 columns and 3 rows then drag the mouse across to 4 columns and drag the mouse down 3 columns.
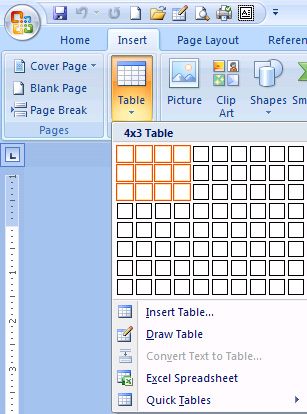
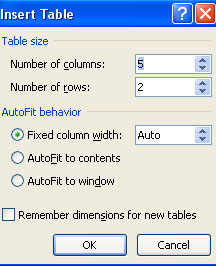
2. Click on Insert table to type in the number of rows and columns your require.
Column width
Column width is adjusted by placing your mouse pointer on
the line separating two columns. You will then see a two
sided arrow appear. Press the left hand mouse button and
drag the line to the left or right.
The Layout tab allows you to select options such as Merge Cells (join), Split Cells, Insert Cells or Delete Cells (adding or removing a row or column)
.

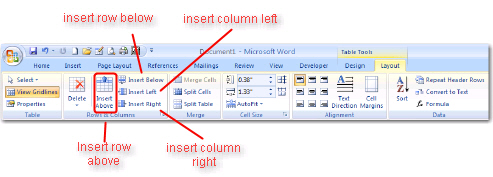
1. Select the column / row by clicking just above the row (or to the left of the column)
2. On the Layout tab, in the rows and columns group, choose whether you want to insert row above/ below or insert column above/below. (see highlighted icons below).
Merge, split, add, delete cells
1. Select the cells you wish to merge
2. On the Layout tab, in the Merge group, select the Merge cells icon.

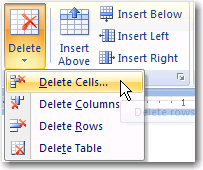
similarly, you can split cells, insert or delete cells (just remember to select the cells first. Below you will see an example for deleting cells:
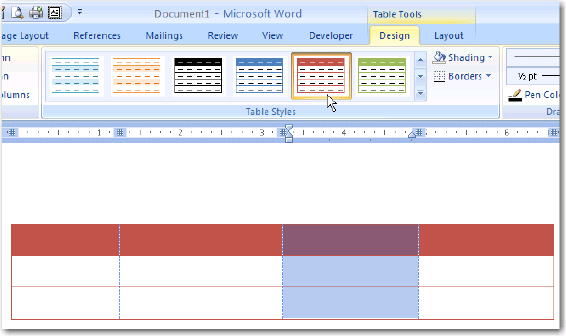
The Design tab allows you to choose a "look" for your table in terms of line styles and shading.
Select any style from the choices in the Table Styles group.
Your table will reflect your choice.
Use the table menu to format the appearance of the Table. Remember to first select the cells which you wish to edit in some way.
1. Click on the Layout tab, select Properties from the Table group
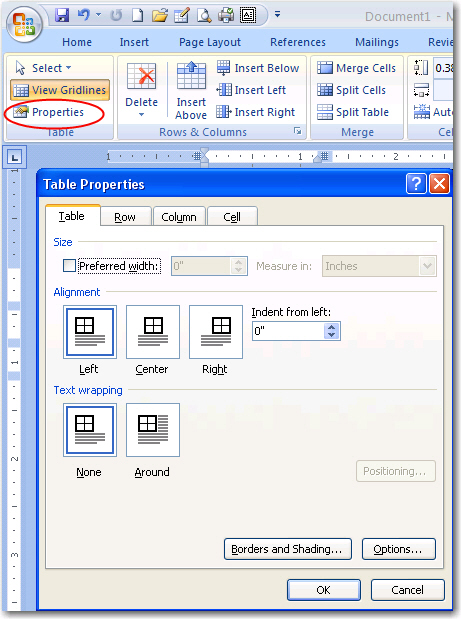
2. Click the Row tab, and specify the Row Height.
3. Click the Column tab, and specify the Column Width.
4. Click OK
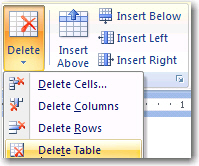
1. Click the table
2. Click on the Delete icon
3. A drop down menu is presented with a choice of what you want to delete. Select Delete Table
All Rights Reserved.