Microsoft Word 2007 - Saving documents
Saving a File
You should save a file after working with it for just a few minutes. Then you should keep saving the updated version of the document as you work (every 5 minutes or so).
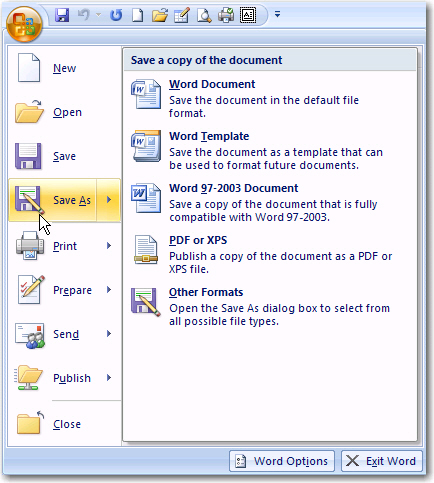
Click on the Office button
Click Save

or
Click on the Save Icon ![]() in the quick access toolbar.
in the quick access toolbar.
The first time you save a file you will be able to give the file a new and unique name (remember it is called Document1 when you first open a new blank file).
Just as with the Open File procedure, you will see a pop-up screen appear on the screen. You must show the computer exactly where you want to save the file (see below).
The Save file pop-up screen:
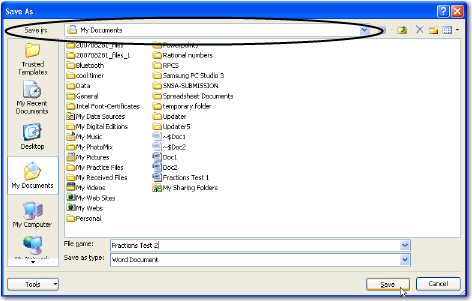
The first thing to do is to
ensure that you are saving the file in the correct folder.
Look at what is written in the Save in: line at the top of the pop-up screen. Type your chosen file
name in the
File name: box
at the bottom of the screen. Then click on the Save button.
You use Save the first time you save a file. You have to name the file
when you first save it. It is recommended that you keep saving
the file every few minutes. You do not have to name it every
time since you have already given it a name. You can save
an existing file by merely clicking on the Save
File Icon ![]()
You use the Save As command when you want to:
- change an existing file name
- change the place where the file is stored
- change the file type
Click on the Office button
Click on Save As
When you choose to use Save As you will be presented with the same pop-up screen as you would when you use Save (see the Save File popup screen above).
If you want to change the file name, simply write the new name in the File name: box at the bottom of the pop-up screen.
If you want to change the place where you save the file, for instance you want to save it
- on a removable stiffy disk
- in a different folder
- on a different computer in the network
you would have to choose the new location by clicking on the little black triangle to the right of the Save in: box at the top of the pop-up screen.
Here is a brief explanation of folders
and drives:
If you want to change the File Type (for instance, you want to save a Word file as a Word 97-2003 document because your friend uses an ealier version of Office) you use Office, Save As and when you see the pop-up screen you have to change the
file type at the bottom of the screen.
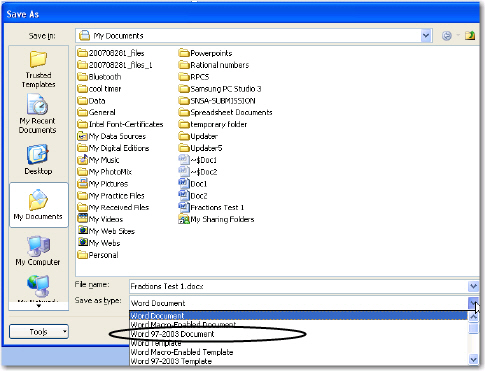
Click on the black triangle
to display the choices and select the type you want to save
as (in this case it is Word 97-2003 Document ).
Creating you own folders
Organizing your files and folders is similar to storing your documents in a filing cabinet. If you don't have very many documents, the task is easy. The more documents you have, the more challenging the task becomes.
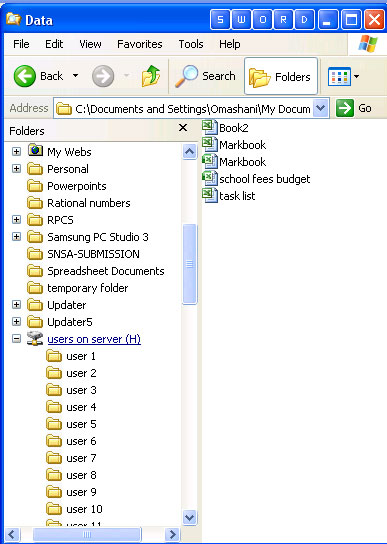
You have your personal storage folder on the network at your school [see above about users on ‘server” (H:)] Each teacher will have their own folder in which to save their information. You should be able to see the folder with your user name from any workstation because each computer can all automatically link to these folders in drive H of the server.
In order to make your own sub-folders within your folder, you can use Windows Explorer as follows:
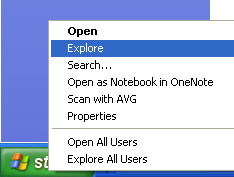
Open Windows Explorer
Right Click on Start
![]()
Click in the Folders section of the screen on users on ‘server’ (H:)
Double click on the folder with your name or user number (if you have not personalised your folder yet)
From the menu bar, click on File then New and then Folder
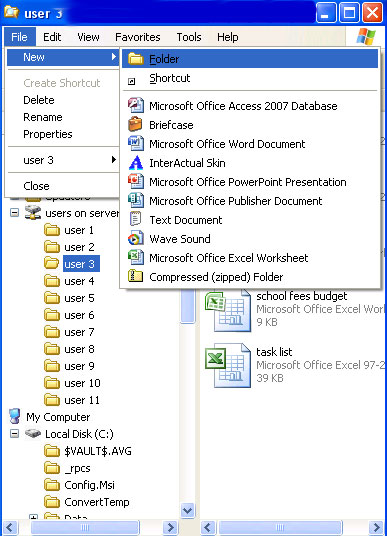
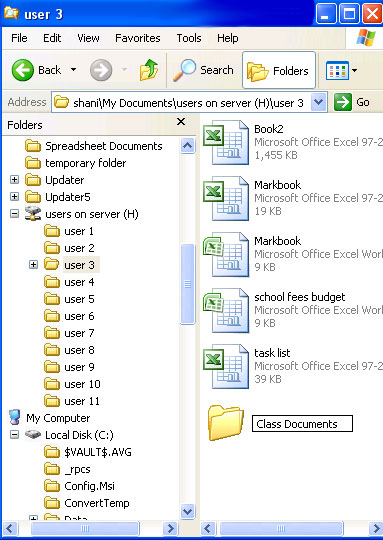
Type
in the required folder name and press <ENTER>
Thereafter whenever you wish to save a document in that folder you should make sure that the name of this folder is showing in the line called Save in: at the top of the pop-up screen before you click on save. (refer back to notes on "Save as" above)
Copyright
Microsoft, SchoolNet SA
All Rights Reserved.
All Rights Reserved.