Microsoft Word 2007 - Saving files as read-only
Microsoft
Word provides several ways to make sure that a document
or file cannot be altered. This function is useful if you want
to make sure no one changes your original document. One
way to protect your file is to make the document Read-only.
A Read-only document can be opened and viewed but you cannot
save any changes made to it. If you change a read-only
document, you can save your changes only if you give the document
a new name.
To make a document Read-Only
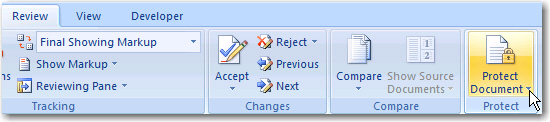
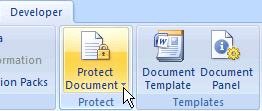
Open the document. On either the Review or Developer tabs, click Protect Document.
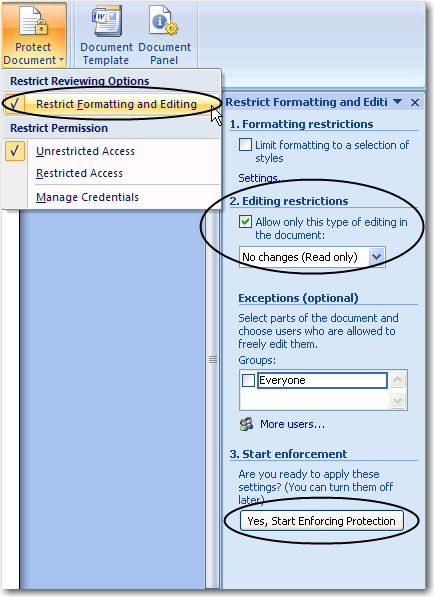
Click Restrict Formatting and Editing. A new menu will appear. Tick the white square in the Editing Restrictions section and select No changes (Read only).
Then select Yes, start Enforcing Protection
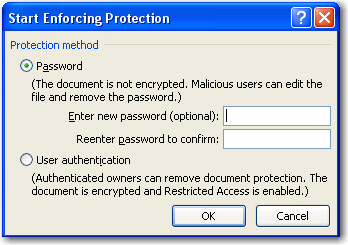
You can set passwords or just click OK .
Once you save the file you will not be able to make changes
unless you remove the Read-only feature.
To remove the Read-Only feature
If a document has been made Read-Only, when you open it a message appears at the bottom of the page indicating that restrictions are in effect in the document.
![]()
To remove the protection:
Click on the Office button
Click on Open, browse for the file.
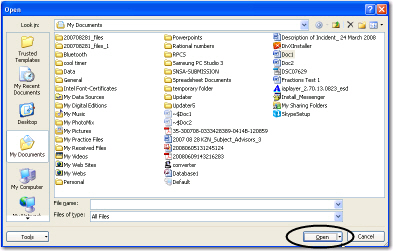
Select the file to Open (see below). Notice that when the file is selected the Open button has a little arrow pointing down (circled).
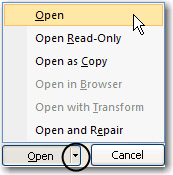
Click on the little arrow. You will notice that the file can be Opened, left as Read-Only or Opened as a Copy.
Open the file as Open. Once teh document is opened a new popup appears on teh right-hand side of teh document. Select Stop Protection.
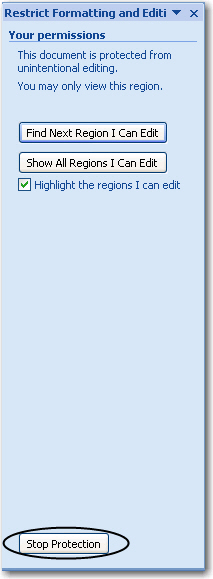
Now you can read and save changes to the file.
All Rights Reserved.