|
The main text attributes are available
from a range of icons as shown below.

Text Style

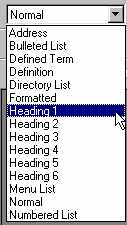
Click on the Change Style
icon. A pull down list (shown below) will appear.
There are only a few styles that one commonly
uses from this list.
Heading1 is used for the main heading of
the page. It is large and bold.
Heading 3 is normally used for paragraph
sub-headings.
As soon as you press the Enter
key, at the end of the line after a Heading
style has been chosen, the text reverts to normal.
Text Font

Click on the Change Font
icon as shown above.
It is advisable to use just one of two fonts
on a web page. Either use Times New Roman or Arial. These
are commonly available on most computers on the Internet.
If you wish to make use of a specific fancy font in a heading,
import that text as a graphic.
Increase
/ Decrease Text Size

Click on the Increase Text Size
/ Decrease Text Size icons as shown above.
This will increase/decrease the text size
by one size from whatever appears on the screen currently.
Bold / Italics
/ Underline

Click on the Bold / Italics
/ Underline icons as shown above.
These features work exactly as they do in
any other Windows programme.
Text Colour

Click on the Text Colour icon
as shown above.
A range of colours are offered to
you in a pull down menu (see image to the right). Click on
one of your choice and then click on OK.
or choose a custom colour (a colour of your
own design)
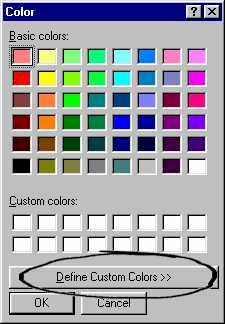
Defining
Custom Colours
Click on the Define Custom Colors
tab as circled in the image to the right.
Select the basic colour of your choice by
clicking in the colour spectrum area (circled in the image
below). You can click and drag the mouse.
A range of that colour (from black to white)
will be shown in the vertical bar to the right of the spectrum
area.
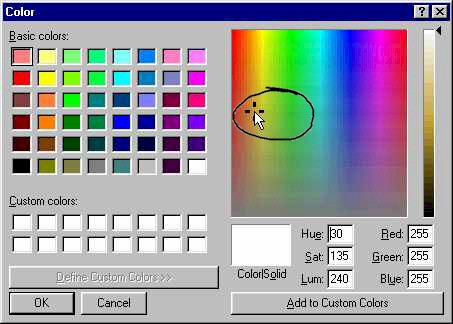
As you click and drag the mouse pointer
up and down the vertical bar to the right (as shown below)
and the sample colour will be shown in the block marked Color|Solid
(as shown below)
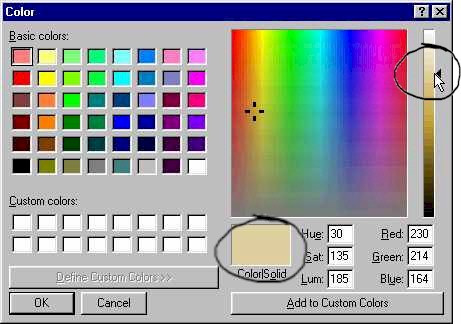
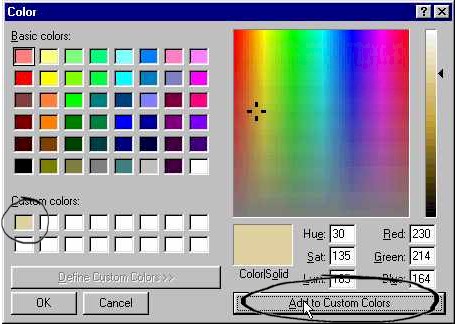
Once you have finally selected the colour
of your choice, click in the Add to Custom Colors
tab ( as shown below) and the colour will be place in one
of the squares under Custom colors.
Then click on OK. When you want to make
use of that colour sometime later in the same session, you
just need to select it by clicking on the colour in the
Custom colors square.
Custom colours are lost when you close the
programme. To re-create the custom colour in another session,
make a note of the values next to Red, Green and Blue and
type these in manually before adding it to custom colours.
Text Justify

Click on the appropriate icon as shown in
the toolbar above.
This paragraph is aligned left.
This paragraph is aligned
centre.
This paragraph is aligned
right.
|