|
This activity is extremely
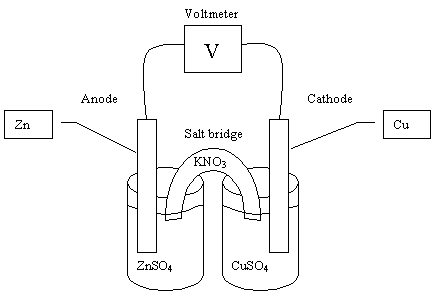
useful for both Maths and Science educators. Using the drawing
tools you can find in MS Word, you can draw diagrams such as this electrochemical
cell.
Before
you start you should open the drawing toolbar by clicking on:
>View
>Toolbars >Drawing.

The Zinc-Copper Electrochemical Cell
- On the drawing toolbar,
click AutoShapes. From the choice of "Basic Shapes" choose
"can".
- Drag the handles to make
the can the shape you want. You will see that you need to do this
twice.
- On the drawing toolbar,
click AutoShapes. From the choice of "Basic Shapes" choose
"block arc" to place between the two can shapes.
- You will also need to label
the diagram by using the text box as used in the previous example
of the triangle:
- Insert a text box where
you require labels
- Format the text box to remove
the line and fill colour. The text box will then become transparent.
- Change the font to Arial
or some other suitable san serif font.
- Copy the textbox to the
other places required. (Hold down the ctrl key and drag is probably
easiest).
- Type in the labels.
- Shift select labels and
diagram. Group the textboxes and diagram so that it stays in one place.
- Format the new object and
choose the wrapping that you want. (MS Word defaults to the setting
where the object is in front of the text).
- You may also use the Line
callout by clicking on
>
AutoShapes >Callouts >Line
Callout 3 as well as the curve by clicking on >
AutoShapes > Lines > Curve.
- Apart from using the above
tools, you may also set the line and fill properties of objects and
set the order in which objects are displayed. When the drawing is
completed, all the objects have to be grouped so that it can be treated
as one object.
- As an option you could
use a caption by clicking >Insert > Caption > Figure.
Good luck ! |
